---
title: "Building Simpl息"
url: https://stanko.io/building-simpl-77CAzym51p5a
author: Stanko Krtalic Rusendic
published: 2025-04-24
updated: 2026-03-12
tags: [ruby, today-i-learned]
---
# Building Simpl息
This week I went for a coffee with a friend. As we talked the topic of hobbies
came up. I mentioned that I was having a lot of fun working on a toy project
over the past week, and then I showed it to him.
[Video: Demo](https://media.stanko.io/originals/articles/building-simpl-77CAzym51p5a/screencast-from-2025-04-23-12-55-40.mp4)
Him: So you are dabbling in React?
Me: No, this is just Rails.
Him: Which libraries did you use?
Me: None, this is as vanilla as it gets.
Him: What!?
### Backstory
For the past 12 months, each month I built an app within a strict time-box of 12
hours.
If the project went overtime, and wasn’t at most 4 hours away from completion,
I’d abandon it. If a project failed, and a lot of them did in the beginning, I’d
reflect what led to that and tried to fix it in the next one.
My goal is to practice pragmatic decision making and to curb [my perfectionism -
which has started to show
again](https://stanko.io/fight-perfection-roooUsSEfduw).
The time-box really helped me make better decisions. At first all my apps failed
because I either over-estimated my speed, or under-estimated the complexity and
unknowns. But around the third one I got better at both. Then came the hard
part - learning to strike a balance between quality work, functionality, and not
obsessing over details.
### Simpliki
Simpliki is the 12th app I’ve built.
It’s an app for practicing diaphragmatic breathing.
I got the idea for it from my girlfriend. She uses a similar app in her
mindfulness practice.
The name is a combination of “simple” and the Japanese word “iki”, which means
“breath”.

You can practice breathing with Simpliki at
[simpliki.app](https://simpliki.app/). And you can [peruse the source-code on
GitHub](https://github.com/monorkin/simpliki).
### Starting from the center
The best way to finish a project is to start from the center and work your way
from there. I focus on what makes the app work - what makes it what it is - and
tackle everything else later. That way I can cut less important bits if I have
to.
For Simpliki the center is the breathing exercise - the place where you practice
diaphragmatic breathing - without that there is no Simpliki.

But I also need a way to get to the breathing exercise - an index screen or
something similar.
Personally, when I want to relax and practice mindfulness I don’t like to have
too many options to choose from - it takes me out of the experience. So I
decided to add a “home” screen with a single button that links to a random
exercise.

My girlfriend likes to practice specific exercises so I added an “Explore”
button that leads to an index page with all exercises.
An app can have many centers interconnected with different features. I think of
the exercise and the home screen as two separate centers, and the index is just
a feature between them.
I learned this from [Christopher Alexander's design
theory](https://en.wikipedia.org/wiki/Christopher_Alexander). The most apt
analogy I found is [in a paper that compares this design principle to patterns
of a
carpet](https://www.researchgate.net/publication/361518671_Finding_the_Center_Christopher_Alexander's_Concept_of_Centers).

Now that I have an idea what I'm building I'll create a breadboard so that I can
work out problems on paper instead of experimenting in code. I skipped this step
for Simpliki as it was, well, simple. But the breadboard would look something
like this.

This also helps me figure out the domain language - what models I have and what
their attributes and methods are called.

### Design
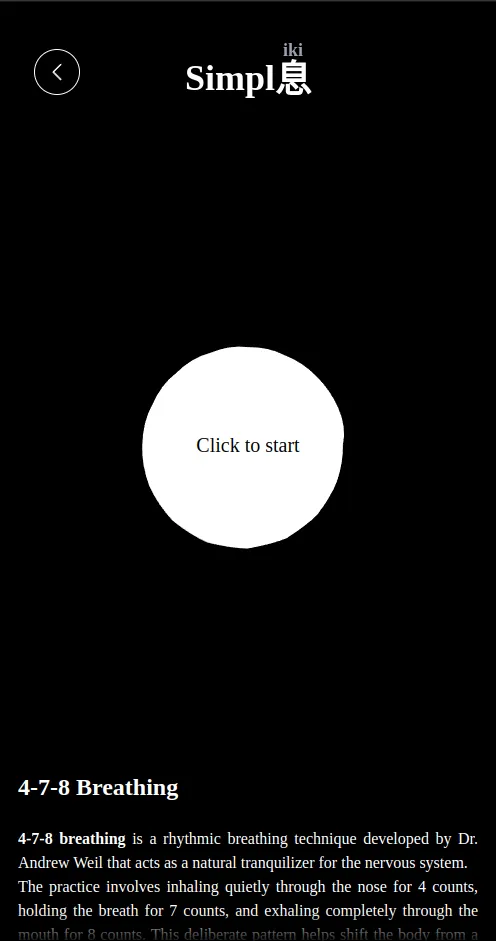
I had a clear vibe I wanted to go for - [Endel](https://endel.io/) +
[Headspace](https://www.headspace.com/). I like Endel's minimalist and
monochrome style - it has a mystical, simple, and concise vibe that I wanted to
replicate. And I find the organic, whimsical, animated shapes and play button
from Headspace calming - exactly the vibe I want for a mindfulness app.


So I decided to combine the two for Simpliki. I'd use Endel's color-scheme and
the animated organic shapes from Headspace.
### Starting a new project
I decided to use Tailwind because I like working with it. And I chose SQLite as
the database because it's the simplest one to use out of the presets. I honestly
don't even need a database for this app, but it's easier to use one than not.
```shell
rails new simpliki --css=tailwind
```
Then in that project I generated my models and a controller
```shell
bin/rails g model Exercise name:string
bin/rails g model Exercise::Step exercise:belongs_to action:string duration:integer position:integer
bin/rails g scaffold_controller Exercise
```
I removed everything that I didn't need, added a "home" action to the
controller, a view for that action, and pointed the root route to that action.
Then I created a few fixtures for
[Exercises](https://github.com/monorkin/simpliki/blob/main/test/fixtures/exercises.yml)
and
[Exercise::Steps](https://github.com/monorkin/simpliki/blob/main/test/fixtures/exercise/steps.yml).
Over the past 5 years I've completely changed my mind about fixtures. I used to
think that they are finicky and convoluted compared to factories. But I've come
to like them more after I've seen the downsides of factories over the years -
they are extremely slow, it's hard to manage what will get created or you have
to define every single record you want to create in every single test.
My favorite advantage of fixtures is:
```shell
bin/rails db:fixtures:load
```
This will take all my fixtures and put them in my current *(development or
production)* database.
Now I don't need to create a way to add or edit Exercises, or add and edit them
manually through the console, before I can start working on the show page. I can
just load in a few exercises and use them. Best of all, I get to see and use the
exact same data that's in my tests - no more trying to figure out what went
wrong, I can just open the same Exercise and see.
Then I started working on the views. At first I just added links between the
pages, added a header that said "Simpl息" on each page, added a plain HTML
"Practice" button on the exercise show page, and created a very simple index
page that shows a list of exercises.
### The ruby tag

Then I remembered reading about the [HTML ruby
element](https://developer.mozilla.org/en-US/docs/Web/HTML/Reference/Elements/ruby)
which is used to show the pronunciation of characters. I thought it would be a
nice way to show where the app's name comes from.
```html
Simpl
息
```
It took about a minute to add and style the "iki" - plain HTML is amazing.
### Animating SVGs
Next I wanted to animate the play button. I've done similar things before so I
was quite confident that I could do it quickly.
[Video: Demo of the circle animation](https://media.stanko.io/originals/articles/building-simpl-77CAzym51p5a/screencast-from-2025-04-23-14-32-42-1.mp4)
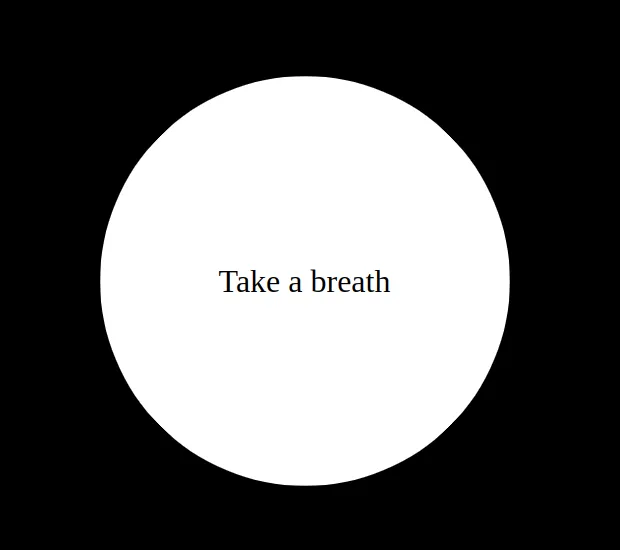
The basic idea is to have an SVG with a single path that consists of 16 points
with [Bezier curves](https://en.wikipedia.org/wiki/B%C3%A9zier_curve) that form
a circle. The number of points determines how organic and uneven the circle will
look in the end - 8 is too blocky, 24 is too smooth, 16 is just right.

Then, every 10ms I change the position of each point slightly and adjust their
Bezier curve points to animate the circle.
To make it undulate - move like there are ripples going across it - I can pull
or push one point after another in or out, and then adjust the Bezier curve
points to make it look hand-drawn.
That's an old computer science trick I learned in college. It sounds
complicated, but it's quite straightforward.
There is just one thing you have to know - if you plot *x = cos(a)* and *y =
sin(a)* where *a* is any value between 0 and 2*PI* you'll get a circle of
radius 1. Then to get any size circle you just multiply everything by the radius
you want.
```js
const NUM_POINTS = 16
const RADIUS = 100
function generatePoints(time) {
const circlePoints = []
for (let index = 0; index < NUM_POINTS; i++) {
// Calculate at what angle the point is supposed to be
const angle = (point.index / NUM_POINTS) * Math.PI * 2
// Convert the angle to coordinates
const x = RADIUS * Math.cos(angle)
const y = RADIUS * Math.sin(angle)
circlePoints.push([x, y])
}
return circlePoints
}
```
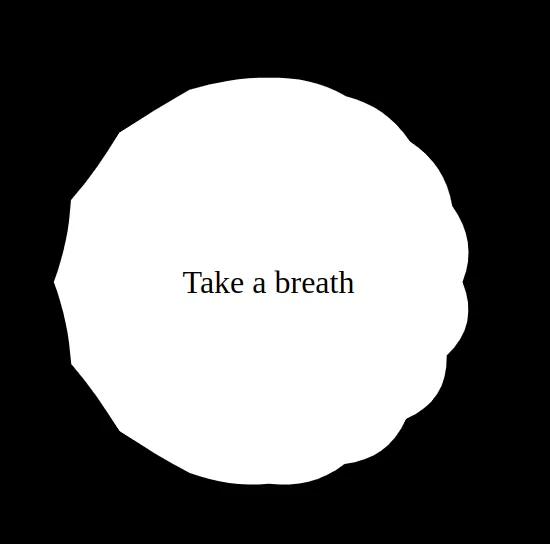
To form waves, I can change the radius for each point using any function that
also includes COS and SIN. That way each point moves in its own little circle
which, when put all together, looks like a wave. And to make it consistent the
SIN and COS have to include the current time.
```js
const NUM_POINTS = 16
const RADIUS = 100
const RIPPLE_FREQ = 0.5 // determines how quickly the waves move
const RIPPLE_AMPLITUDE = 5 // determines how big the waves are
const circlePoints = []
function generatePoints(time) {
const circlePoints = []
for (let index = 0; index < NUM_POINTS; i++) {
// Calculate at what angle the point is supposed to be
const angle = (point.index / NUM_POINTS) * Math.PI * 2
// Generate a new radius
// the values were completely arbitrarily chosen
// you could also just use sin(time) + cos(time)
// this just looks nice to me
const rippleY = Math.sin(time * RIPPLE_FREQ + angle)
const rippleX = Math.cos(time * RIPPLE_FREQ * 0.7 + angle * 1.3)
const ripple = (rippleY * 0.6 + rippleX * 0.4) * RIPPLE_AMPLITUDE
// Convert the angle to coordinates
const x = RADIUS * Math.cos(angle) + (ripple * Math.cos(angle))
const y = RADIUS * Math.sin(angle) + (ripple * Math.sin(angle))
circlePoints.push([x, y])
}
return circlePoints
}
```
[Then I can just move the bezier curve anchors in the same way to get a
hand-drawn
look.](https://github.com/monorkin/simpliki/blob/main/app/javascript/controllers/circle_animation_controller.js#L88-L92)
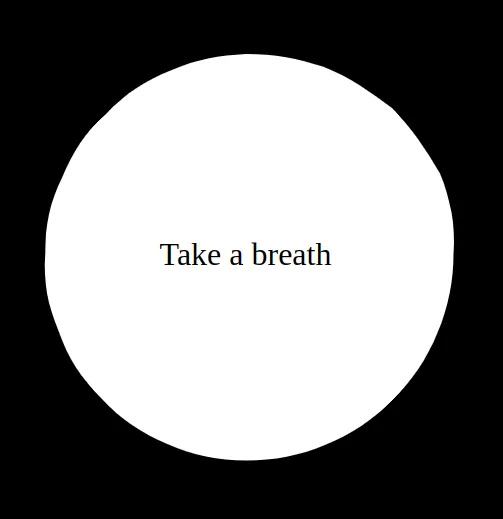
The end effect is subtle, but it makes the circle look friendlier.
### View transitions
Next I animated the view transitions. This takes maybe 10 minutes but makes the
app feel way more modern and responsive.
First I [enabled view transitions in Turbo
Drive](https://turbo.hotwired.dev/handbook/drive#view-transitions) by adding
this meta tag to the head section of my layout
```html
```
Just adding this one line will already add a fade effect to all page
transitions. Then to move individual elements around, like the logo, I have to
add it a *view-transition-name* CSS property with a unique name.
```css
#logo {
view-transition-name: logo;
}
```
After that the browser animates the transitions on its own.
[Video: Demo of the logo moving with page navigation](https://media.stanko.io/originals/articles/building-simpl-77CAzym51p5a/screencast-from-2025-04-23-15-35-32.mp4)
For the explore page I wanted to add an animation where the list slides in from
the bottom of the page. Luckily this can be done with a few lines of CSS.
```css
@keyframes slide-to-top-from-out-of-view {
0% {
transform: translateY(100vh);
opacity: 0;
}
100% {
transform: translateY(0);
opacity: 1;
}
}
#exercises {
view-transition-name: exercises;
}
html:not([data-same-page-visit])[data-turbo-visit-direction="forward"]::view-transition-new(exercises) {
animation: 0.25s ease-out slide-to-top-from-out-of-view both;
}
```
This tells the browser to apply a *slide-to-top-from-out-of-view* animation for
any new exercises list that appear.
[Video: Demo of the exercise list sliding in from the bottom of the screen](https://media.stanko.io/originals/articles/building-simpl-77CAzym51p5a/screencast-from-2025-04-23-15-23-44.mp4)
There is one caveat, View Transitions aren't supported on Firefox. This only
works on Chromium and WebKit based browsers. As one of the 2% of global Firefox
users I don't mind, the app still works without the transitions.
### The breathing animation
Now that I have an animated circle I want to create a breathing animation to
help people pace their breath.
The circle should grow when you have to breathe in, and shrink when you have to
breathe out.
[Video: Demo of the breathing animation](https://media.stanko.io/originals/articles/building-simpl-77CAzym51p5a/screencast-from-2025-04-23-16-31-36.mp4)
To animate this I need to create three circles - a maximum indicator, a minimum
indicator and a progress indicator.
The maximum indicator is static and just has an opacity of 10%. The minimum
indicator is mostly static after an initial animation that moves it in place.
And the progress indicator constantly shrinks and grows as needed.
But rendering one animated SVG at 60 FPS is already quite taxing, and
synchronizing three undulation animations would be a headache. Luckily plain
HTML saves the day again with SVG symbols.
In an SVG you can define any set of paths or shapes as a symbol and give it an
ID. Then you can render the same symbol in any other SVG in the same HTML with
the *use* tag. You can even change the fill and stroke properties on the *use*
tag to get different versions of the same shape. And when you update the shape
in the symbol it immediately reflects in all other SVGs using that symbol.
```html
```
With a symbol I just have to animate one SVG and then I can reuse the same
animated shape in any other SVG on the same page. [I've created a helper to make
things more
readable.](https://github.com/monorkin/simpliki/blob/main/app/helpers/circle_helper.rb#L16)
```ruby
circle_id = dom_id(@exercise, :circle)
# Renders an animated circle as a symbol with the id circle_id
animated_circle(symbol: circle_id, class: "hidden") +
# Renders the minimum indicator
animated_circle(use: circle_id, class: "absolute inset-0 z-30 w-full select-none", stroke: "black", stroke_width: 2, name: "exercise-circle-min", data: { exercise_target: "minCircle" }) +
# Renders the progress indicator
animated_circle(use: circle_id, class: "absolute inset-0 z-20 w-full select-none", data: { exercise_target: "progressCircle" }) +
# Renders the maximum indicator
animated_circle(use: circle_id, class: "absolute inset-0 z-10 w-full select-none opacity-10", name: "exercise-circle-max", data: { exercise_target: "maxCircle" })
```
With that out of the way I now have to animate the progress circle. I read about
the [Web Animations
API](https://developer.mozilla.org/en-US/docs/Web/API/Web_Animations_API/Using_the_Web_Animations_API)
a few weeks ago and it seemed like just the right tool for the job.
It was my first time using that API and I think I hit every edge case there is
with it.
Long story short, don't use fill forwards and instead manually set your desired
state with the *onfinish* callback. For some reason, fill forwards applied a new
CSS rule every time an animation ran. After a few minutes I had a hundred
animation style blocks in my Inspection window, all overriding each other. Also,
remove any transitions on the animated element as that will make the animation
wonky in Firefox (but works fine everywhere else) - the browser will handle the
transition for you.
After I figured that out, the rest was straightforward
```js
async function inhale(duration, element) {
return new Promise(resolve => {
const animation = this.progressCircleTarget.animate([
{ transform: `scale(0.25)` },
{ transform: `scale(1.0)` }
], {
duration: duration * 1000,
easing: "linear"
})
animation.onfinish = () => {
this.progressCircleTarget.style.transform = `scale(1.0)`
resolve()
}
}
}
async function exhale(duration, element) {
return new Promise(resolve => {
const animation = this.progressCircleTarget.animate([
{ transform: `scale(1.0)` },
{ transform: `scale(0.25)` }
], {
duration: duration * 1000,
easing: "linear"
})
animation.onfinish = () => {
this.progressCircleTarget.style.transform = `scale(0.25)`
resolve()
}
}
}
```
[Now I just had to pass the exercise steps to the Stimulus controller, and run
the
animation](https://github.com/monorkin/simpliki/blob/main/app/javascript/controllers/exercise_controller.js).
This just meant that I had to define a *steps* value of type Array and serialize
the steps as JSON on the HTML element.
### Sound
With the animation done I wanted to also add an audio cue that you should
breathe in or out.
At first I thought that the simplest way to add sound was to play some sound
file - like a gong or a flute - at different playback speeds for different
durations, and pitch it down to cue and exhale.
This turned out to be a dead end. I could change the playback speed but at 0.5x
playback the sound of a gong starts to sound like Hell's bells.
Then I remembered the [Web Audio
API](https://developer.mozilla.org/en-US/docs/Web/API/Web_Audio_API) with which
you can generate sounds. [I found a nice tutorial that explains how to make a
bell sound](https://www.youtube.com/watch?v=OAsTq5SKnEw), but I was out of my
depth here and decided to reach for an LLM so that I don't run out of time.
I created a scaffold class with the interfaces I wanted to have and asked
ChatGPT to implement the class so that it generates "a nice and relaxing sound
that inspires breathing in a mindfulness app I'm working on, kind of like Endel
or Headspace". [After a bit of back and forth I had something that I thought was
decent](https://github.com/monorkin/simpliki/blob/main/app/javascript/models/sound_player.js).
But it didn't work on my iPhone... Turns out that Apple disables Web Audio
playback if your ringer is set to silent, even though the volume is up - odd
choice, but ok.
You can listen to the sound at [simpliki.app](https://simpliki.app/), just pick
any exercise and start it. If you are on an iPhone be sure to set your phone
*OFF* silent.
### Scroll snapping
As I was working on the breathing animation I noticed that I forgot to record if
you are supposed to breathe with your nose or mouth, so I had to go back, add a
migration, and update the fixtures.
Then I thought that showing a short description about the exercise would be nice
so I added ActionText, and a [few fixtures for
it](https://github.com/monorkin/simpliki/blob/main/test/fixtures/action_text/rich_texts.yml).
```shell
bin/rails action_text:install
```
But now that the exercise page could have an overflow and users would have to
scroll I wanted the scrollbar to snap if you were close to the top of the
screen. That way the exercise circle would always be in focus and you can't
accidentally scroll away.
Once again HTML, or rather CSS, saves the day - this time with scroll-snap.
I just added the [*snap-y* and
*snap-mandatory*](https://tailwindcss.com/docs/scroll-snap-type) Tailwind
classes to the container, and
[*snap-start*](https://tailwindcss.com/docs/scroll-snap-align) to the container
of the exercise circle - that's it. Now the browser snaps to the top when you
scroll near the top of the page.
[Video: Demo of the page snapping to the top when you scroll near the top](https://media.stanko.io/originals/articles/building-simpl-77CAzym51p5a/screencast-from-2025-04-23-17-30-35.mp4)
### Full text search
Since I had four hours left at this point I decided to add full-text search to
the index page.
[This too was surprisingly easy thanks to an article by Sergio
Alvarez](https://www.teloslabs.co/post/full-text-search-with-rails-and-sqlite).
All I needed to do was to create a special kind of virtual table
```ruby
class AddFullTextSearchToExercises < ActiveRecord::Migration[8.0]
def change
create_virtual_table :exercise_full_text_search_vectors, :fts5, %w[name description]
end
end
```
Populate it and then query it. [I created a concern under the Exercise
class](https://github.com/monorkin/simpliki/blob/main/app/models/exercise/searchable.rb)
that does that. That way the search logic is nicely self-contained.
```ruby
# frozen_string_literal: true
class Exercise
module Searchable
extend ActiveSupport::Concern
DEFAULT_LIMIT = 25
VECTOR_TABLE_NAME = FullTextSearchVector.table_name
included do
has_one :full_text_search_vector, foreign_key: :rowid, dependent: :destroy
after_save :create_or_update_full_text_search_vector
end
class_methods do
def search(query)
return all if query.blank?
where("#{VECTOR_TABLE_NAME} MATCH ?", escape_fts_match_value(query))
.joins(:full_text_search_vector)
.order("bm25(#{VECTOR_TABLE_NAME})")
.distinct
end
def escape_fts_match_value(input)
input.to_s
.gsub('"', '""')
.split(/\s+/)
.map { |word| %Q("#{word}") }
.join(" ")
end
def create_or_update_all_full_text_search_vectors
all.find_each(&:create_or_update_full_text_search_vector)
end
end
def create_or_update_full_text_search_vector
params = {
id: id,
name: name,
description: description.to_plain_text
}
sql = if full_text_search_vector
ActiveRecord::Base.sanitize_sql_array(
[
"UPDATE #{VECTOR_TABLE_NAME} SET name = :name, description = :description WHERE rowid = :id",
params
]
)
else
ActiveRecord::Base.sanitize_sql_array(
[
"INSERT INTO #{VECTOR_TABLE_NAME} (rowid, name, description) VALUES (:id, :name, :description)",
params
]
)
end
self.class.connection.execute(sql)
end
end
end
```
With that I can do a full-text search across all exercises
```ruby
Exercise.search("box")
```
### Pagination
Now that I had search I wanted to add pagination. [Years ago while exploring
what Strada/Turbo Native
was](https://stanko.io/how-i-stumbled-upon-strada-while-forwarding-an-email-3W8mbS5KSKXs)
before it was released I saw that 37signals has a really neat way of handling
pagination.
They have a "pagination" controller that goes and fetches the HTML of the next
page, parses it to get the contents of itself from the next page, and then adds
that contents to the current page.
No need for special routes or turbo-stream handlers, you just render the
paginated page like always and let the controller do the rest. So I tried to
recreate that.
First I tried to fetch the next page and parse it using
[DOMParser](https://developer.mozilla.org/en-US/docs/Web/API/DOMParser) to get
the next page's document. My first stab worked quite well.
```js
async #fetchNextPageDocument() {
const url = this.nextPageLinkTarget.href
const response = await fetch(url, {
headers: {
"Accept": "text/html",
}
})
if (response.ok) {
return new DOMParser().parseFromString(await response.text(), "text/html")
} else {
console.error("Failed to fetch next page:", response.status)
return null
}
}
```
Then all I had to do was append the children from the new document to the
current one
```js
const doc = await this.#fetchNextPageDocument()
const newList = doc.querySelector(`[data-${this.identifier}-target="list"]`)
Array.from(newList.children).forEach(child => {
this.listTarget.appendChild(child.cloneNode(true));
});
const newNextPageLink = doc.querySelector(`[data-${this.identifier}-target="nextPageLink"]`)
if (newNextPageLink) {
this.nextPageLinkTarget.replaceWith(newNextPageLink.cloneNode(true))
} else {
this.nextPageLinkTarget.remove()
}
```
[And it worked like a
charm](https://github.com/monorkin/simpliki/blob/main/app/javascript/controllers/pagination_controller.js).
I just render the next page like always and let the controller do the rest.
[Video: Demo of the pagination controller loading in more exercises](https://media.stanko.io/originals/articles/building-simpl-77CAzym51p5a/screencast-from-2025-04-23-18-34-33.mp4)
### Auth, create, update & delete
Since I still had time left I decided to implement CRUD for exercises. [Here I
decided to use the new auth
generator](https://guides.rubyonrails.org/security.html#authentication). It gave
me Users and Sessions, all I now needed to do was add views.
I quickly wrote a nested form Stimulus controller, some CSS to style the inputs
and called it a day.
[Video: Demo of the sign in process and CRUD actions](https://media.stanko.io/originals/articles/building-simpl-77CAzym51p5a/screencast-from-2025-04-23-18-40-17.mp4)
### Conclusion
I wanted to share how I built Simpliki because everyone I show it to seems to
think that it's some SPA made with the latest technology trend when in reality
it's just [a vanilla Rails
app](https://github.com/monorkin/simpliki/blob/main/Gemfile) that uses a few
browser APIs.
Modern browsers are capable of a lot that just a few years ago required cutting
edge technology and all the complexity that comes with it.
But I also wanted to sing the praises of time-boxing your work and working on
toy-projects. It helped me develop a healthier way to think and break an old
habit.